5 Instagram-Inspired DIY Home Decor Projects To Tackle This WeekendSome home upgrades—notably anything involving plumbing or electricity—demand a professional. But others? Not so much. In fact, in an age when homeowners feel empowered to square off with many home improvement projects themselves, creating DIY decor has become a typical weekend activity.

So to keep you busy during these first few weeks of spring, we’ve assembled a collection of home projects inspired by our current favorite interior-design posts on Instagram. Here are five fabulous, high-reward endeavors no one will believe you actually pulled off yourself.

1. Built-in entryway bench

This cozy entryway bench, seen in a post from @michaelaiduss, makes a wonderful first impression on anyone who walks through your front door. And it won’t take you more than a few days to recreate on your own.

“A built-in entryway bench adds a touch of luxury,” says Sarah Gaffney, lead designer at Next Stage Design. “If you have some carpentry skills, these are actually doable yourself. Otherwise, you can also use a high-backed settee to create a similar look.”

Get the look: Check out this tutorial to create a DIY entryway bench.

2. Wainscot bedroom walls

We love design elements that make a home feel rich with history, and these wainscot walls do all that and more in this cozy bedroom designed by @lindsay_salazar_photography.

“Wainscotting gives a nostalgic feeling to any space by bringing a neoclassical architectural element to your room,” says designer Courtney Wollersheim, of FLOOR360. “Painting the wainscot an unexpected color like cool blue or sage green modernizes this iconic design feature.”

Get the look: Create your own wainscot bedroom walls with this guide, then paint them in a contemporary shade such as Modern Love or Lawn Party by Backdrop Home.

3. Recessed display cabinets

Looking for more storage space but coming up short on the “space” part? Check out these recessed cabinets from @vivirdesign.

“Recessed display cabinets are an efficient way to display items, without taking up space in your living area,” says Johnson. “Add extra design punctuation with decorative pulls, or by painting the border of your shelves or cabinets.”

Get the look: Find a recessed wall shelf by shopping this collection, then check out this tutorial for the install.

4. Large-striped wallpaper

Who doesn’t love a bold, retro wallpaper? These larger-than-life stripes, seen in a post from @joinfreddie, can be achieved with your own two hands in just a few days.

“Vertical stripes are a great way to trick the eye into thinking a small space is larger than it is,” says Gaffney. “I would recommend stripes in neutral tones, like the ones pictured, as they won’t overwhelm other parts of your design.”

Get the look: Re-do your powder room with this striped wallpaper.

5. Brass pot rack


Lately, we’ve clocked a kitchen trend that indicates homeowners are getting comfortable with displaying their wares. Some have swapped cabinets for shelves, while others have opted for glass-front doors on their cabinets.

If you’re keen on showing off your beautiful collection of pots and pans, we have good news: you can build a DIY rack similar to the one above from @michaelaiduss.

“Floating shelves and bar carts are everywhere,” says Johnson. “It was only a matter of time before ceiling racks made a triumphant return.”

Get the look: Follow along with this tutorial to make your very own DIY pot rack.


For this and related articles, please visit Realtor.com

Xeriscaping is the practice of designing landscapes to reduce or eliminate the need for irrigation. This means xeriscaped landscapes need little or no water beyond what the natural climate provides.

Xeriscaping has been embraced in dry regions of the western United States. Prolonged droughts have led water to be regarded as a limited and expensive resource. Denver, Colorado, was one of the first urban areas to support xeriscaping. That citys water department encouraged residents to use less of the city’s drinkable water for their lawns and gardens.

Xeriscaping has become widely popular in some areas because of its environmental and financial benefits. The most important environmental aspect of xeriscaping is choosing vegetation that is appropriate for the climate. Vegetation that thrives with little added irrigation is called drought-tolerant vegetation. Xeriscaping often means replacing grassy lawns with soilrocksmulch, and drought-tolerant native plant species. Trees such as myrtles and flowers such as daffodils are drought-tolerant plants.

Plants that have especially adapted to arid climates are called xerophytes. In desert areas like Phoenix, Arizona, xeriscaping allows gardeners to plant native xerophytes such as ocotillo.

Supporters of xeriscaping say it can reduce water use by 50 or 75 percent. This saves water and money. In Novato, California, residents were offered conservation incentives (reductions in their water bills) to convert from traditional lawns to xeriscaping. The citys water department estimated that the houses that chose xeriscaping saved 120 gallons of water a day.

Another main component of xeriscaping is installing efficient irrigation methods. Drips and soaker hoses direct water directly to the base of the plant and prevent the water evaporation that sprinklers allow. More efficient irrigation is also achieved when types of plants with similar water needs are grouped together. A xeriscaped landscape needs less maintenance than an area landscaped with grass and water-intensive plants.

Drought-Tolerant Plants

The most common example of a xeriscape-friendly plant is the cactus, which has hundreds of different species that are native to North and South America. Cacti have evolved many physical adaptations that conserve water. For example, their prickly spines, the cactus version of leaves, protect the plants from water-seeking animals. Their large, round stems have thickened to store large amounts of water. Their waxy skin reduces water lost to evaporation.

Cacti are far from the only plants appropriate for xeriscaping. Other drought-resistant plants include agavejuniper, and lavender. Many herbs and spices are used in xeriscaping, such as thymesage, and oregano. Some plants used for food are drought-resistant, such as black walnutsJerusalem artichokes, and sapodilla, a sweet fruit native to Mexico.

FAST FACT

Natural Xeriscaping
The saguaro is a cactus that has become a familiar icon of Western movies. They dominate the desert landscapes of Arizona and northern Mexico, and can grow as tall as 15 meters (49 feet). As frightening as the saguaro can be because of their sharp spines, there are many bird and mammal species that call them home. The gila woodpecker and gilded flicker are two bird species that are good at carving out nesting sites in the saguaros. When these birds abandon the nests, other species, such as the elf owl or cactus wren, often take them over.


For this and similar articles, please visit National Geographic

11 Decor Pieces From Amazon That Interior Designers Buy Over and Over Again

Amazon is the premier site to buy, well, anything. It’s even become a popular stop for budget-minded shoppers looking for home decor pieces.

But, like the rest of the site, the Amazon home decor section is a bottomless pit of products. So to help you sift through all the options and find the real tried-and-true gems, we asked design professionals to share their top picks that they buy over and over again.

Amazon is brimming with home furniture and accessories that interior designers can’t get enough of. Ahead, a curated list of stylish home decor finds at affordable prices.

1. Natural linen curtains

Linen curtains
Linen curtains

(Amazon)

If you’d like a pair of high-quality drapes that can breathe life into any room, pick up these natural linen curtains. Recommended by Mariya Snisar, the head of interior design at Renowell, these work well with any design style—from rustic and bohemian to industrial and beyond.

“They’re lightweight and work great for light-filtering without making the room look too dim,” Snisar says. “I also think linen has that innate coziness that can make any room look much more welcoming.”

2. Vintage-looking knobs

Vintage-inspired knobs
Vintage-looking knobs

(Amazon)

Snisar is also a fan of these vintage-looking knobs that can be added to all different types of furniture.

“They are pretty cheap but can give any drawer a new life, especially if you decide to paint it to match the handles,” she says.

Available in two different finishes, these knobs work perfectly for dresser drawers and kitchen cabinets.

3. Wooden coffee table with hidden storage

Coffee table

(Amazon)

Maximize the storage in your house by ordering a coffee table with a secret compartment to store books, blankets, and more. This pick has a wood grain table top that opens to reveal a hidden nook.

“I love how this table looks rustic but modern at the same time,” Snisar points out. “Plus, the extra storage space may come in handy if your living space is small.”

4. Runner rug from Loloi

Vintage-style runner rug

(Amazon)

Purchasing rugs for your home can be a headache-inducing, stressful activity. Not only do you have to consider size, material, and shipping, but you also have to pay attention to the price. This is because rugs, especially trendy vintage Turkish rugs, tend to run into the thousands.

If you’re in the market for a new rug, Alessia Lamonaca, owner and lead designer at New Mode Home, advises checking out Loloi rugs.

“These rugs are popular for a reason,” says Lamonaca. “They have a ton of beautiful designs to choose from at a very affordable price point.”

5. Wool and mohair throw blanket

Wool throw blanket

(Amazon)

Sure, Amazon has tons of low-priced deals, but it’s also a treasure trove if you’re looking for unique products from top-rated brands worldwide.

Shani Core, an interior designer based in Palm Beach Gardens, FL, points out that besides the “obvious coffee table books,” Amazon has plenty of high-quality home goods from dependable brands.

“My favorite things to order from Amazon for clients include high-quality wool and mohair throws from the Biddy Murphy Store in Ireland,” Core says.

These throws come in many colors and work great as housewarming gifts.

6. Bedside crystal carafe set

Crystal carafe set

(Amazon)

The saying “it’s all in the details” really rings true when decorating a home. Considering this, Core shares that this crystal carafe set is one of her favorites. Not only is it pretty to look at, but it also adds an “elegant and useful touch” to your main or guest bedroom.

7. A leather catchall

Leather catchall

(Amazon)

Scattered keys and change can make any tabletop look messy. Thankfully, a leather catchall can help with this.

Recommended by Core, this leather organizer valet helps “corral odds and ends wherever needed throughout the home.” Its sleek design also helps it blend in effortlessly with many decor aesthetics.

Available in various shades, including khaki green and camel, this piece is especially nice to keep on nightstands and foyer tables where clutter tends to gather.

8. Irregularly shaped mirror

Irregularly shaped mirror

(Amazon)

Is your decor feeling a little stale? Beth Martin, founder and designer at Beth Martin Design, suggests picking up an irregularly shaped mirror from Amazon. She points out that these mirrors have become a decor must-have in recent years thanks to their playful, organic shape.

“This fun design is perfect for compact spaces like an entryway or bedroom,” Martin says.

9. Gold outlet covers

Gold outlet cover

(Amazon)

Design-forward outlet covers, such as this one, can help elevate room decor using little to no effort. They’re also easy to install.

This pick, recommended by Lamonaca, has a matte metallic finish and looks good in the kitchen, bedrooms, and bathrooms.

“Brass outlet covers are an inexpensive way to make your home feel custom and expensive,” she explains.

10. Dimmable artwork light

Artwork light

(Amazon)

Don’t leave your paintings or photographs in the dark. If you have art hanging on your walls, then you need this dimmable artwork light. These affordable fixtures can help you achieve museum-worthy lighting at little cost.

“This picture light will instantly add a layer of elegance and sophistication to your home,” Lamonaca says.

11. Book-shaped vase

Book vase

(Amazon)

You might already have a whole collection of vases, but we bet you don’t have this book vase available on Amazon for under $25.

Snisar points out that this might not be “everyone’s cup of tea,” but “this vase can look great on a coffee table, on a cabinet in the bedroom, and even in the kitchen.”


For this and similar articles, please visit Realtor.com

If you can imagine a storybook cottage straight out of a fairytale, then you have a good idea of what a Tudor home looks like. Tudor homes originated in England during the Tudor period (between 1485 and 1603) and ranged from smaller cottages to larger country manor homes.

“You know you are looking at a Tudor home when it has a steeply pitched roofline, all brick exterior, stucco accents with wood patterns, and arched doorways,” says Sandra Shurling, broker/owner at Re/Max in Greensboro, GA. “Also, the enormous chimney is a must in a Tudor home—not only was it used to heat the home but to also make a statement.”

Tudor homes are quaint and cozy and can still be found throughout the U.S. For historic home enthusiasts, there’s lots to love about Tudor homes. Here’s a little background on this classic architectural style.

What Is a Tudor House? This Architectural Style Is Right Out of a Fairy Tale

A brief history on Tudor homes

Tudor architecture reflects a style that became popular in Europe during the reign of Henry Tudor VIII.

The style originated in England and Wales and combines Renaissance and Gothic design elements built with high-quality materials and craftsmanship. By the 1900s, architects brought the style with them from Europe to America and started a whole new Tudor revival.

Tudor-style homes started popping up across the U.S. around the mid-19th century and grew in popularity until World War II. Tudor homes reached their peak in popularity in the 1920s, and by the 1940s, less expensive, mass-produced housing developments started producing Tudor-inspired homes.

“Tudor-style homes became popular in the U.S. in the 1920s among the nation’s wealthy who were building near town centers,” says Shurling. “The elegance of a Tudor home was attractive to those wishing to display their wealth. The medieval style from England also gave a romantic feel to the home.”

Key characteristics

tudor home
Brick Tudor home

(Realtor.com)

Asymmetric design is a popular feature on a Tudor home. You can identify a Tudor home on the street by its steeply pitched roof with front-facing gables, mullioned windows made of leaded glass, and tall chimney protruding above the steep roof.

Tudor homes can have brick exteriors or half-timbering accents consisting of wooden boards with stucco or stone in between. They usually have embellished front doors that look like they belong on a castle with arches or decorative ornamentation.

Common interior features include wood beams, white stucco walls, and rounded doorways and windows.

“In today’s architecture, we do see a lot of the Tudor aspect used on large estate homes,” says Shurling. “Where I live on Lake Oconee [in Georgia], the enormous lakefront homes often use the steeply pitched roofline, rounded stucco doorways, and elaborate chimneys as statement pieces just as the original Tudor style became popular to show wealth.”

The American Tudor

Tudor home
Tudor home

(Realtor.com)

In the early to mid-1900s, Tudors began sprouting up in the U.S. The American Tudor continued the trend of an asymmetric roof with pitched gables, a half-timbered frame, and a stucco or brick façade.

These types of homes were usually two stories, and since their materials were expensive, they were constructed in more well-to-do neighborhoods. That’s why they earned the nickname “Stockbroker’s Tudors” since most people during the Great Depression couldn’t afford these kinds of homes.

The American Tudor homes typically have off-center front doors and more ornate details around windows and doors. Tudor-style homes were particularly popular in the northern U.S. but can be found in suburbs all over the country.

“Tudor homes were very popular in northern climates with lots of snow. The steeply pitched roofline and sturdy construction can withstand the weight of the snow and not allow it to pile on the roof,” says Shurling.

Gavin Townshend, author of “The Tudor House in America, 1890–1930,” called the Tudor Revival the most popular style for U.S. homes between 1890–1930, next to the Colonial Revival.

Some famous Tudor homes include the Getty House in Los Angeles; the Nathan Moore House in Oak Park, IL; and the M. Lloyd Frank Estate, also known as the Frank Manor House, in Portland, OR. (This estate is now part of the campus of Lewis & Clark College.)

getty house
Getty House is the official home of the mayor of Los Angeles.

(Ericnp/Wikipedia)

Since Tudor homes were popular and built in the 1920s, many of these types of homes are now considered historic and can be found near historic small-town squares.

“Where I once lived in downtown Monroe, GA, our street had several Tudor homes, and I never tired of walking past them,” says Shurling. “They draw you in, begging you to stare and dream of a different time.”


For this and related articles, please visit Realtor.com

The home appraisal process is just a formality when buying real estate, right? You’ve found the house you love and put in a good offer, and it was accepted! It’s time to break out the bubbly? Sorry, not yet.

If you’ve applied for a mortgage, your home-to-be still has to undergo a comprehensive appraisal of its worth—and an unfavorable home appraisal can kill a real estate deal. Yikes! It can be a nerve-racking ordeal, but it’s actually good for you. Allow us to demystify the process.

The Home Appraisal Process: What Homebuyers Need to Know

Appraisals: Estimating a home’s value with fresh eyes

Just because you and the sellers have agreed on a price doesn’t mean it’s a done deal—your lender needs to be on board, too. After all, it’s the lender’s real estate investment as well. To get a mortgage, you’ll need a home appraisal because the home serves as collateral for your lender. If for some reason you end up unable to make your mortgage payments, the lender will have to foreclose on your home, then sell the property to recoup its costs. So your mortgage lender will have to know the value of your home before handing over that large loan.

While the home appraisal process is somewhat similar to getting comps—as you did to determine a fair price—the appraiser delves in deeper to determine the home’s exact value.

An appraiser will investigate the condition, the square footage, location, and any additions or renovations. From there, they will appraise the home and determine its value.

An appraiser is trained to be unbiased, says Adam Wiener, founder of Aladdin Appraisal in Auburndale, MA.

“I don’t care what anybody wants the home to be worth,” he says. “As an appraiser, I’ll give you the answer. You may not like it, but it’s the answer.”

Off-site, the appraiser may also evaluate the current real estate market in the neighborhood to help determine the value of the property.

Usually, the lender or financing organization will hire the appraiser. Because it’s in the best interest of the lender to get a solid home appraisal, the lender will have a list of reputable professionals to appraise the home.

Whoever takes out the mortgage pays for the home appraisal, unless the contract specifies otherwise. Then the buyer pays the fee in the closing costs. If a seller is motivated, they may pay for the home appraisal themselves to back their asking price, which benefits the buyer by reducing closing costs.

You’ll get a copy of the home appraisal, too

An appraiser sets out to determine if the home is actually worth what you’re planning to pay. You might be surprised by how little time that takes; the appraiser could be in and out of a home in 30 minutes, and that’s not a reason to panic.

An appraiser doesn’t have the same job as a home inspector, who examines every little detail. While they’ll pay particular attention to problems with the foundation and roof, the home appraisal process includes noting the quality and condition of the appliances, plumbing, flooring, and electrical systems.

With data in hand, they make their final assessment and give their report to the lender. The mortgage company is then required by law to give a copy of the appraisal to you.

Appraisers work for your lender—not you

As the buyer, you’ll pay for the home appraisal. In most cases, the fee is wrapped into your closing costs and will set you back $300 to $400. However, just because you pay doesn’t mean you’re the client.

“My client is the lender, not the buyer,” Wiener says. This ensures that appraisers remain ethical—in fact, it’s a crime to coerce or put any pressure on an appraiser to hit a certain value. Appraisers must remain independent.

“Anything less, and public trust in the appraisal is lost,” says Wiener.

They protect buyers from a bad deal

In essence, the home appraisal process is meant to protect you (and the lender) from a bad purchase. For instance: If the appraisal comes in higher than your asking price, it’s generally fine. Sure, the sellers could decide they want more money and would rather put their home back on the market; but in most cases, a deal will go through as expected.

If your appraisal comes in lower than what you offered, this is where things get tricky: Your lender won’t pony up more money than the appraised price. So if you and the sellers agree on $125,000 but the appraisal comes in at $105,000, it creates a $20,000 shortfall. What’s a buyer to do? Read on.

A curveball appraisal isn’t necessarily the end

If the appraisal process happens, your appraisal comes in low, and your contract with the seller was contingent on an appraisal, you could walk away and have your earnest money returned.

If you prefer to buy the home anyway (or waived your appraisal contingency), there are some other paths you can pursue:

  • Come up with the cash to cover the difference between the appraisal and offer price.
  • Ask the seller to cover the difference.
  • Challenge the appraisal, and pay for a second opinion.

However, keep in mind that your new report could come out identical. Also remember that if you do choose to walk away, that’s actually good news, although it may not seem like it at the time. Why? Because the appraisal kept you from paying too much for your home.


For this and related articles, please visit Realtor.com

Experiencing art on the wall of a museum or gallery is one thing, but to witness it within the surroundings where it was made is another, far rarer opportunity.

Luckily a small number of the world’s most famous artists, from Monet and Rodin to Jackson Pollock and Louise Bourgeois, have had their homes and studios preserved as monuments, in some cases remaining much as they were left by their celebrated occupants.

Here are 12 of the best artists’ homes you can visit around the world.

Auguste Rodin – La Villa des Brillants, Meudon, France

Artists' homes you can visit: Rodin's Villa des Brillants

Photography: Aconcagua

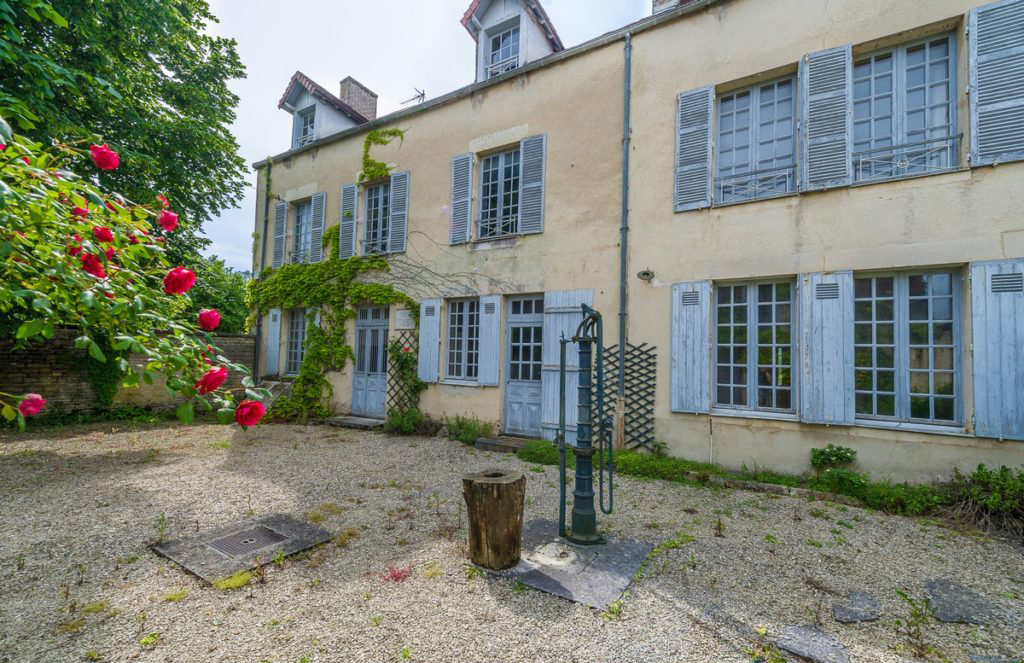
Rodin bought this villa in the Parisian suburbs in 1895, and by 1900 it had become the centre of his creative world, where he employed a collection of 50 assistants, casters and sitters, welcomed friends and admirers to see his work, and was ultimately buried.

Today the artist’s house has been returned to a state that the sculptor would have recognised, with his living and working environment reconstructed using period photographs. Particularly notable is its collection of early casts for some of Rodin’s most famous works, including The Gates of Hell. The poet Rainer Maria Rilke, Rodin’s secretary for a time, described the ‘tremendous impression’ of the ‘dazzling white sculptures [that] seem to gaze out at you from behind high glass doors, like creatures in an aquarium.’

Claude Monet’s home and garden – Giverny, France

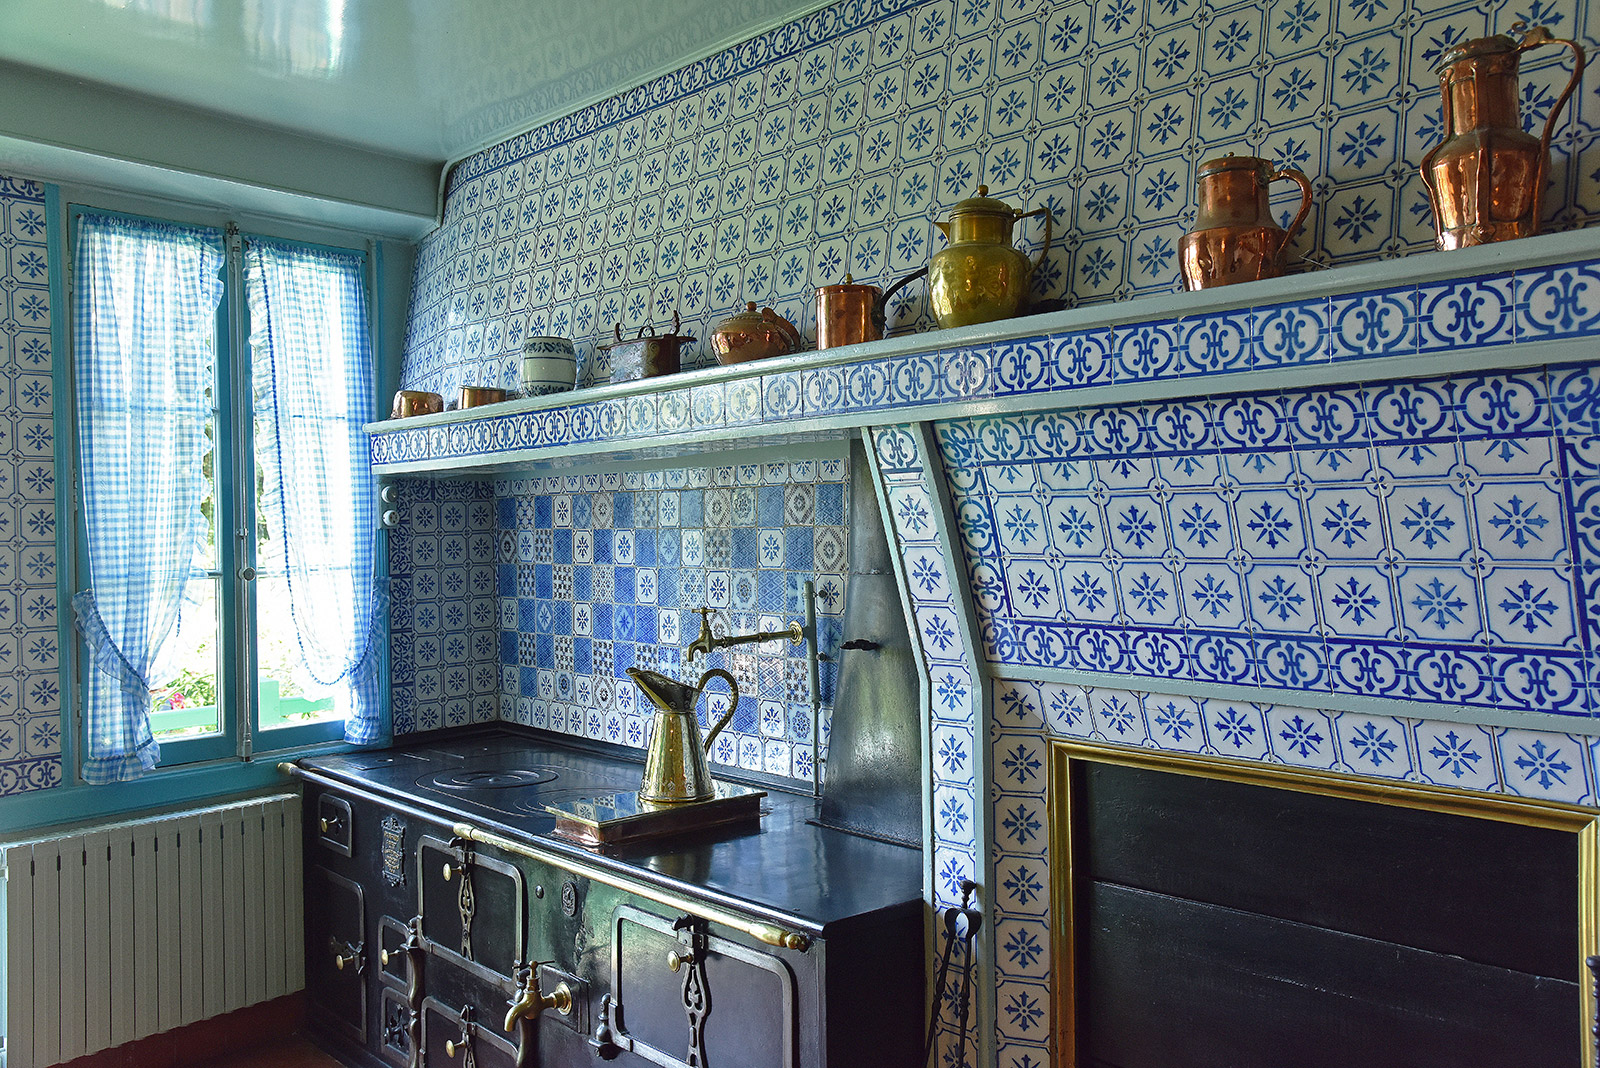
Artists homes you can visit: Monet's kitchen

Photography: Harvey Barrison

For anyone who’s ever wanted to talk through a painting, a visit to Claude Monet’s house and gardens in Giverny is a must. The artist lived in this small Normandy village for 40 years, diverting the nearby river Epte to create the famous water garden that inspired and starred in so many of his masterpieces. The artist’s home itself is notable for its colours: it features bright pink exterior walls, and vivid blues, greens and yellows inside, chosen by Monet to align with the palette of his own works. Take a virtual tour here.

Casa Dalí, Portlligat, Spain

Photography: Alberto Gonzalez Rovira

In 1930, Salvador Dalí bought a fisherman’s hut in the tiny village of Portlligat. He envisaged a room four-metres-square that would serve as dining room, studio and bedroom, with some steps up to a tiny kitchen and bathroom. ‘I wanted it all good and small,’ he wrote in his autobiography, ‘the smaller the more womb-like.’ Over the next 40 years, these plan would change.

Photography: Alberto Gonzalez Rovira

The village became his principal residence and source of inspiration, and the house spread ‘like a real biological structure’ to include four more huts, creating a labyrinthine abode as singular as its owner. Today the artist’s house remains largely as it was, stuffed with artworks and oddities collected and treasured by Dalí. Take a virtual tour here.

Donald Judd’s home – 101 Spring Street, New York, USA


Donald Judd bought the five-storey former garment factory on Spring Street in 1968. First conceived as a private studio, he soon reconfigured it as a living space and gallery for both his own work and others.

Determined not to interrupt the clean line of the glass facade, he inserted his kitchen, bathrooms and library into the northeast corner of each floor. Museum quality pieces – a neon sculpture by Dan Flavin, a Duchamp shovel – are shown alongside the more prosaic evidence of Judd’s day-to-day life.

Frida Kahlo’s home – La Casa Azul, Coyoacán, Mexico

Casa Azul in Mexico City

Photography: Rod Waddington

La Casa Azul, or Blue House, was built by Frida Kahlo’s father in 1904: it was where she was born in 1907 and where she died, 47 years later in 1954. It was transformed into a museum in 1958, and remains almost as it was when she died, evoking her tempestuous relationship with Diego Rivera and the many passions of her life. Portraits of her heroes Lenin and Mao hang over the bed, while her clothes hang in the wardrobe. Kahlo’s art collection fills the walls, and her wheelchair sits by an unfinished portrait of Stalin. Even Kahlo’s ashes are on display in an urn. Take a virtual tour here.

Georgia O’Keefe’s home – Abiquiu, New Mexico, USA

Courtesy of the Georgia O'Keeffe Museum

Courtesy of the Georgia O’Keeffe Museum

Georgia O’Keefe discovered the ruins of a 5,000 sq ft Spanish colonial era compound in Abiquiu in 1935. She was struck by a black door in the wall. ‘It was something I had to have,’ she said. ‘It took me ten years to get it – three more years to fix the house so I could live in it – and after that the wall with a door was painted many times.’ Sitting within the landscape she made iconic, and preserved much as she left it, the artist’s house and studio atmospherically evokes her world, and is open for visits by appointment.

Louise Bourgeois House – 347 West 20th Street, New York, USA


Louise Bourgeois bought the Chelsea townhouse she shared with her husband Robert Goldwater in 1962. Following his death 11 years later, she transformed the house into an artist’s studio and filled every room with the processes and results of her work.

Seven years after her own death, the house is being opened to the public by The Easton Foundation. Described by the New York Times as being in a state of ‘bohemian dilapidation’, it has been little altered since the days of her famous Sunday salons, where she invited young artists to show their work and face her – often blistering – criticism.

Check the foundation’s website for updates on its grand opening. Arts club The Cultivist offers early tours of the artist’s house and studio for its members.

Barbara Hepworth’s St Ives home – Cornwall, UK

Barbara Hepworth Studio St Ives

Photography: Haarkon / India Hobson & Magnus Edmondson

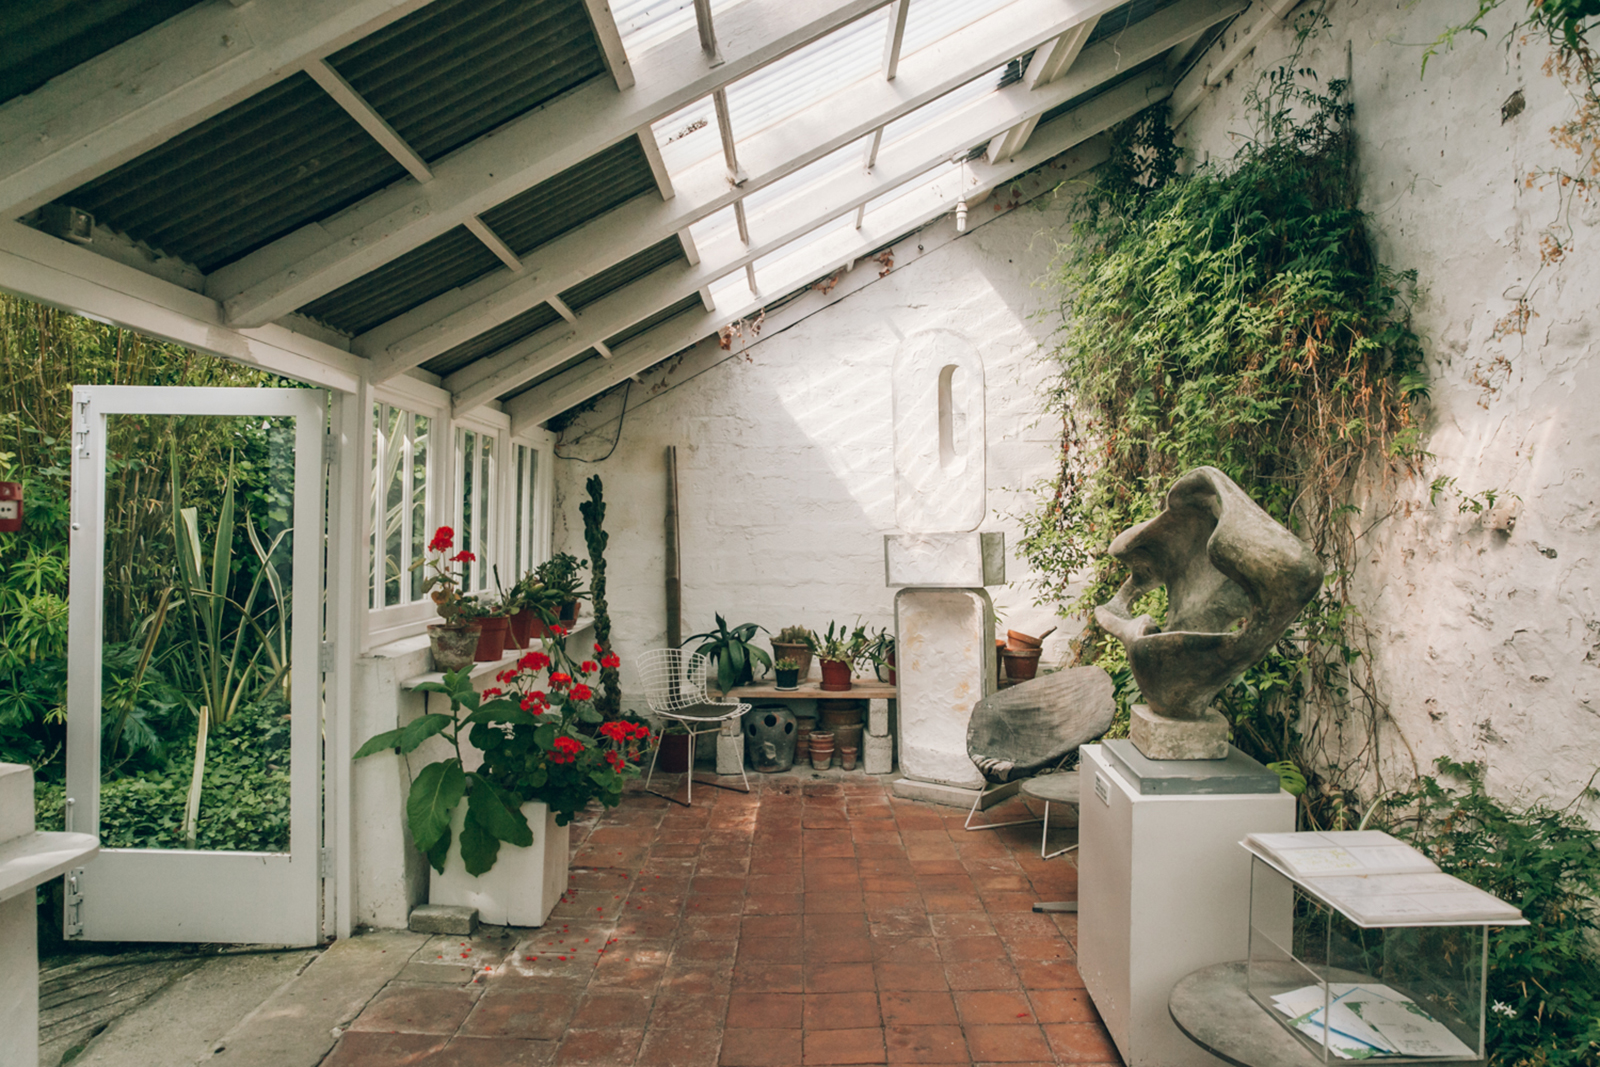
Hepworth first came to St Ives – her ‘spiritual home’ – with her husband Ben Nicholson and their family at the outbreak of war in 1939. She returned, without Nicholson, in 1949 and never left, living and working at Trewyn Studios until her death in 1975. The site is now managed by Tate and remains true to the artist’s time – the gardens laid out as she designed them, punctuated by her large-scale bronzes. There is an element of tragedy too: the studio, which stands today filled with tools and unfinished works, was where she died in an accidental fire at the age of 72.

Pollock-Krasner House – East Hampton, USA

Jackson Pollock and Lee Krasner studio

Photography: via Pollock-Krasner House and Study Center (c) Stony Brook University

Jackson Pollock changed the landscape of modern art with his revolutionary drip paintings, many of which were created in his modest home studio in the Hamptons. Evidence of his innovation remains on the wooden floor, which is liberally spattered with paint from his perambulations around the canvases. ‘On the floor I am more at ease,’ he said. ‘I feel nearer, more a part of the painting, since this way I can walk around it, work from the four sides and literally be in the painting.’ After Pollock’s death in 1956, his wife Lee Krasner took over the artist’s home and studio, working there for the rest of her life.

Frederic Leighton – Leighton House, London, UK

Leighton House Arab Hall

Photography: Will Pryce via The Royal Borough of Kensington and Chelsea

Leighton House is an unassuming Victorian mansion tucked down a quiet Kensington street. Its exterior does little to prepare the visitor for the dazzling, gilded splendour to be found within. Built and extended over 30 years to the exact specifications of painter Lord Leighton, it is a private palace of art, filled with his own works – mostly biblical and classical in nature – as well as pieces by his contemporaries, and stunning flights of interior fancy such as the golden domed and richly mosaiced Arab Hall.

Pierre-Auguste Renoir’s summer home in Essoyes, France

Essoyes Renoir

Via Centre Culturel du Coté des Renoir. Photography: Sylvain Bordier

From 3 June visitors can go inside the home of Impressionist artist Pierre-Auguste Renoir in France’s Essoyes. The town is where Renoir and his wife – model Aline Charigot – spent their summers from 1896 until his death in 1919, and the property has undergone an extensive €1m restoration to its fin-de-siècle interiors and gardens. You can also make pilgrimage to the garden studio where the painter worked, which forms part of the estate and is already open to the public.

JMW Turner – Sandycombe Lodge, Twickenham, London

JMW Turner's former home, Sandycombe Lodge in London

Photography: Anne Purkiss ©Turner’s House Trust Collection

Before becoming an artist, JMW Turner trained as an architectural draughtsman and in 1812 he even turned his hand to designing his own home, Sandycombe Lodge. Turner spent his weekends at the Twickenham retreat until he sold it in 1826. It later underwent a clumsy Victorian extension and its red bricks were hidden under a layer of white render.

Turner’s House Trust now owns the artist’s home, and it enlisted Butler Hegarty Architects to return the Grade II* listed abode to Turner’s original vision, including the ‘penny line’ pointing, and scraps of wallpaper unearthed during the restoration. Sandycombe Lodge now welcoming visitors who can learn more about Britain’s favourite landscape painter.


For this and related articles, please visit thespaces.com

Ahome inspection can be a terrifying process to newbie buyers: What if the house you adore has major problems hiding beneath that shiny new coat of paint? If you lie awake haunted by visions of mold or foundation problems, it’s time to take a deep breath.

Here’s everything you need to know about home inspections, and how (as scary as they might seem) they exist to protect you from a very bad deal.

We have insights into how to make the most of this all-important step. OK, exhale.

What First-Time Buyers Must Know About Home Inspections

Hire a top-notch home inspector

While it may be tempting to hire any run-of-the-mill home inspector to get the job done—particularly if the price is right—the inspection is no time to cut corners.

After all, buying a home is an enormous investment. “Everyone does themselves a disservice when they shop by price alone,” says Alan Singer of Sterling Home Inspections in Armonk, NY. “Plenty of inspectors don’t know what they’re doing and set up shop because it’s easy to do.”

So, first, check your local requirements: Many states require an inspector to have a license or insurance, and not having either is a huge red flag.

Even if insurance isn’t mandated, you’re better off choosing an inspector who is insured, which protects both of you against errors and omissions. Membership in a professional trade organization, such as the National Association of Home Inspectors, indicate the inspector is up-to-date on the latest developments in the field—another giant plus.

Attend the home inspection

Even though you will receive a written report after the home inspection, you should attend the inspection while it’s being done. It provides a valuable opportunity to learn all about the inner workings of your would-be new home. “I much prefer it when buyers are there so we can discuss the home in person,” Singer says. “It’s much easier to explain the ramifications of an issue when we’re standing in front of it.” Plus, it sure beats deciphering a 10-page report about HVAC issues or plumbing problems.

So, don’t be afraid to ask questions. Really stick your nose into the home inspection. You and your inspector will be looking at all sorts of things you might have skipped during your showings, like the attic and crawl space, and under the sinks. Don’t be scared to delve into the details. Even the best home will receive a laundry list of to-do’s and potential problems, and fixing them will be much easier with a hands-on understanding of the issues involved. Consider it free (and invaluable) fix-it advice.

Don’t panic (until it’s time to panic)

The vast majority of issues raised during a home inspection are repairable—after all, as Singer describes it, you’re buying a “used home.” Just like a used car or an old computer or second-hand clothing, there are bound to be problems.

Some of them may be small and easily fixed, like leaky pipes or rattling doorknobs. But if an inspector discovers a major problem—with, say, the foundation or water intrusion—even that may not be a deal killer. In fact, it could be a bargaining chip you can discuss with the sellers before closing the deal.

Work with your agent to determine the best approach. If your offer was contingent on a successful inspection (and most are), you have a good basis to request that the current owners make repairs before closing. You’ll want to get this in writing, along with provisions if the sellers fail to fix the problems.

But there’s no obligation for sellers to address the inspector’s discoveries. If they aren’t willing to shoulder the burden, you need to assess whether the cost of a large issue is worth the reward. If the home needs a new roof, mold abatement, or a foundation fix, you’ll need to do the math and be real with yourself.

With no solution beyond paying tens of thousands out of your own pocket, you might need to move on to a more habitable home. “People get very invested in the home they want to buy, and it all becomes a very overwhelmingly emotional experience,” Singer says. “But they need to listen to the advice of the inspector, take a look at the financial ramifications, and make a clear-headed decision.”


For this and related articles, please visit Realtor.com

Wondering how to choose a Realtor®? Purchasing a new home takes some serious prep work—from cleaning up your credit score to amassing a down payment.

But, hey, we’re just getting started! You also need a comrade in arms: a close ally to help steer you toward homes you’ll love more than life itself, find the best possible mortgage, and all in all help you through this emotionally and financially taxing process. That’s where a good real estate agent can make a world of difference.

Here’s how to find one who’s got your back. And your front. Every side, actually.

How to Pick a Real Estate Agent When You’re Ready to Buy Your First Home

How to choose a real estate agent

The first thing you might notice while trying to find home-buying help is all the different titles: agent, broker, Realtor®, etc. Are they all the same thing? Not exactly.

Realtor® is either an agent or broker who is a member of the National Association of Realtors®. Realtors adhere to a detailed code of ethics to treat their clients honestly and fairly. Consider it added insurance that they’re committed to your cause.

real estate agent is anyone who’s earned a license to sell property, which typically entails taking 100+ hours of course work and then passing a state exam. A broker is someone who’s continued his studies and can hire agents to work under him.

Conduct a preliminary search online

We shop online for everything these days, and finding a real estate agent is no different. To locate ones in your area, use online tools such as Realtor.com®‘s Find a Realtor search, which will give you useful info such as the Realtor’s number of years of job experience, number of homes sold, and the price of homes typically dealt with. Take note of a Realtor’s track record, because this can tip you off to superstar agents nearby and whether they’re a fit for your needs.

Don’t settle for ‘good enough’

According to the NAR, more than half of first-time buyers found their Realtor through a friend—and two-thirds contacted only one agent before moving forward. That’s kind of like having your friends set you up on a blind date, then marrying that person by Date No. 2. After all, how can you be sure you made the right choice without looking around? Simple: You can’t.

“One of the things I always tell my prospects is, ‘I’m flattered if I’m the only Realtor you are speaking to, but I think it’s best if you speak with two or more so you can draw comparisons and make a powerful decision,’” says Brett West, an agent with McEnearney Associates.

Trust us, there can be a huge difference between an agent who’s “good enough” and one who’s stellar—the difference between finding your dream home or not, and saving or wasting tens of thousands of dollars.

So the extra legwork you do now could really pay off in the (not so) long term. Be sure to explore at least a few options and grill them thoroughly before settling down with one.

Ask 5 key questions before picking a Realtor

Ask a prospective Realtor all of these questions. This is no time for being shy.

A true professional will have no issues with you asking questions. Reaching a certain comfort level with your agent is key to calming the anxiety around your house hunt.

1. How long have you been in real estate?

You’re looking for a seasoned agent—and while they don’t need to have decades of experience, less than a year or two of experience can be concerning.

2. How long have you lived in this area?

One noteworthy exception to the previous question is if they’ve lived in the area for a long time.

“A newly licensed agent shouldn’t be automatically removed from consideration,” says Mindy Jensen, a Realtor with Equity Colorado Real Estate. “If they’ve lived in the area their entire life, they likely know more about it than an agent who has been in the business for years but only recently moved to the region.”

Weigh overall experience against local experience when making your decision.

3. Do you have a team, or do you work alone?

Many standalone agents are excellent, but don’t ignore the value of a team.

“Working with a team is important,” says Angelo Puma, a real estate agent in Keller, TX. “It increases response time and availability. Often, solo-run agents are double-booked when you need their attention, and you may lose that perfect property.”

4. What is your schedule?

If they’re not a full-time agent, you need to know when they’ll be available.

“If the only time you can see houses is in direct conflict with times they have to be working their other jobs, you could miss out on a lot of properties,” says Jensen.

5. Do you have any vacations planned?

If they’re heading out of the city anytime soon, make sure they have a back-up in case you find the perfect home while they’re out of the country. “Murphy’s Law rules Realtor vacations,” says Jensen.


For this and similar articles, please visit Realtor.com

You’re this close to owning a new home, you can almost taste it. The closing paperwork is prepared, your new digs passed the inspection, and—wonder of wonders—you’re even happy with your loan. Homeownership is just on the other side of the hill.

As long as the final walk-through goes according to plan.

OK, take a breath—there’s no need to panic. The vast majority of walk-throughs reveal no problems at all, and even if they do, most issues are easily fixed. Still, it can be an awkward, stressful process that can make you want to reach for heartburn medication, especially for first-time buyers. Learn what to look for on your last trip through the house before the sellers hand over the keys. Your new keys!

What to Watch for on Your Final Walk-Through of a Home

Create a checklist

Before your walk-through, work with your agent to create a comprehensive checklist covering all of your concerns with the home—the items that you’d like to see addressed or fixed, pronto. Look at your notes from previous walk-throughs and the inspection report to determine what areas of the house you should double-check.

“Simply having a checklist during final walk-through can greatly reduce any issues,” says Joe Stanfield, a Realtor in Charlotte, NC.

Other things to add to your inspection list include ensuring that all appliances work—make sure to turn them on while you’re in the house—as well as the bathroom plumbing.

Check the windows, doors, as well as all outlets and lights. If anything is amiss, bring it up with the sellers as soon as possible and negotiate a fee the sellers can give you by personal check to cover the costs of fixing it yourself. It’s your last chance. Make it count.

Ensure required repairs were completed

Most sellers are good, ethical people, but you never know if you’re dealing with a sneaky individual until the final walk-through. But they might not have been deliberately sneaky: they may just have a transitory case of seller amnesia, whose symptoms include the oft-heard line, “Oh, I meant to get to that.”

After all, the selling process can be hypercomplicated—leaving required repairs unfinished because priorities have been focused elsewhere.

“Sometimes a seller will have indicated that a repair previously negotiated during the due diligence period was completed, but the buyer finds out during the walk-through that it has not,” says Suzette Gray, a Realtor with Coldwell Banker in Charlotte, NC.

She recommends asking for copies of paid invoices for all repairs. If it’s a simple repair—such as patching up drywall or replacing a faucet—ask them to send you a photo of the completed work before the walk-through, “so there are no surprises.”

And while civility is key, this is not the time for preternatural politeness. If you do find something wrong that they’d vowed to address, it’s worth the awkwardness of bringing it up face to face and demanding compensation—after all, a promise is a promise. Right?

Inspect previously hard-to-reach spots

During your final walk-through, inspect everything you couldn’t check out earlier due to lack of time.

“You always want to ensure that you aren’t stuck with problems that were previously hidden from view,” says Seth Stisher from the Seth Realty Team in Charleston, SC.

Did an enormous Persian area rug cover the living room floor before? Was the couch pushed flush against the wall? Take a careful look at the hardwood below for any water damage or rot. This goes double if you’re buying a home with a basement that was previously filled with boxes. Basements are ground zero for mold, water damage, and other structural issues, and it’s easy for sellers to hide (or miss) problems behind a layer of clutter.

Look for missing items—or secret swaps

Make sure all appliances and fixtures you’d liked during earlier visits are still present—or haven’t undergone a subpar substitution.

“If you were promised a chandelier and now there is an empty socket, that’s not going to fly,” says Janine Acquafredda, a Realtor in Brooklyn, NY.

Basically anything connected to the home by plugs or pipes should stay—or if the sellers intended to keep something other than their furniture and belongings, it should be specified in the contract. Swapping out the bronze cabinet pulls for mediocre chrome replacements isn’t OK, either, and you have every right to demand them reinstated before the home changes hands.

Don’t panic over a little dirt

You might be expecting a picture-perfect, Architectural Digest–ready home, with polished hardwood floors and shining countertops—but few real estate contracts mandate those expectations, instead asking for the place to be “broom clean.” Which does not mean “scrubbed within an inch of its life.”

Usually that’s your job. Sorry.

“Everyone has a different definition of broom clean, and if the place is a little dirty it’s not the end of the world,” says Koki Adasi, a Realtor with Koki & Associates in Silver Springs, MD. Don’t stress over minor problems such as scratches in the hardwood or marks on the walls. It’s certainly not worth raising a fuss over—not only will it annoy the sellers, but chances are you’ll cause minor damage of your own during move-in.


For this and related articles, please visit Realtor.com

If you’ve been thinking about installing solar panels, you’re not alone. Solar power has been heating up—and with good reason: It’s cheap, clean, and scalable. With just an hour and a half of sunlight, this renewable energy source could meet the world’s energy consumption for an entire year. But is solar power the right investment for you and your home? We chatted with experts to weigh the pros and the cons.

Is It Worth It: Installing Solar Panels

Pro: Installing solar panels will save you money on utilities. 

One of the most obvious reasons to install solar panels is that doing so can significantly reduce utility bills—by about $1,500 per year on average, based on monthly electricity bills of around $120. The exact amount, of course, depends on the size of your roof, your sunlight exposure, and how much you spend every month on electricity. As a general rule, the more you spend, the more you stand to save.

But, says Connecticut architect Duo Dickinson, homeowners really need to do their own research. Start with an online solar calculator, like Energy Sage or PV Value; the latter requires registration but is endorsed by the Appraisal Institute.

Con: Installing solar panels is expensive.

Solar panels don’t come cheap. Even after factoring in tax incentives, you can expect to spend somewhere in the neighborhood of $10,000. If you’re saving $1,500 per year on electricity costs, it’ll take years, not months, to recoup that initial investment.

On the other hand, solar panels have become “much more financially viable in this last decade,” Dickinson says. The panels themselves “are cheaper and they produce more energy. And they’re easier and cheaper to install.”

Pro: Installing solar panels probably will increase your home’s value.

Research consistently shows that adding solar increases the value of your home—and Twin Cities, Minnesota-based Realtor Brandon Doyle agrees: “Most savvy buyers will understand that they’re getting something that creates power for them every month, saving them money during their ownership.”

How much depends on a number of factors, like where you live and how much money those solar panels save you on your annual utility bills. According to the U.S. Office of Energy Efficiency and Renewable Energy, you can expect your home’s value to increase about $20 for every $1 reduction in annual utility bills. Based on the average annual savings of $1,500, sellers could expect their home value to increase by $30,000.

Con: Installing solar panels may deter some buyers. 

While companies like GAF are changing the aesthetics of solar panels, the vast majority of options on the market right now aren’t very attractive, says Dickinson. And, he adds, they’re something you probably see everyday when you come home. Said differently, while you might embrace solar panels for the savings and greener source of energy, there’s no guarantee the next buyer will.

Pro: Solar panels are a renewable source of energy.

Cost aside, the fact that solar power is a renewable source of energy with zero greenhouse gas emissions is a huge plus. Of course, as with most things, there are mitigating factors, including the environmental impact of manufacturing and the issue of solar trash. But the overall environmental impact of solar panels over their lifetime is a net positive.

The bottom line

“Long term, solar is a great investment,” Doyle says. If you think you’ve found your forever home (or even your five-to-10 year home), you’re going to come out ahead financially. What’s more, improvements to technology mean we’ll see more options and lower prices in the years ahead, making solar panels an even more attractive option.


For this and similar articles, please visit Realtor.com